18/12/2023
How to clean foggy headlights at home

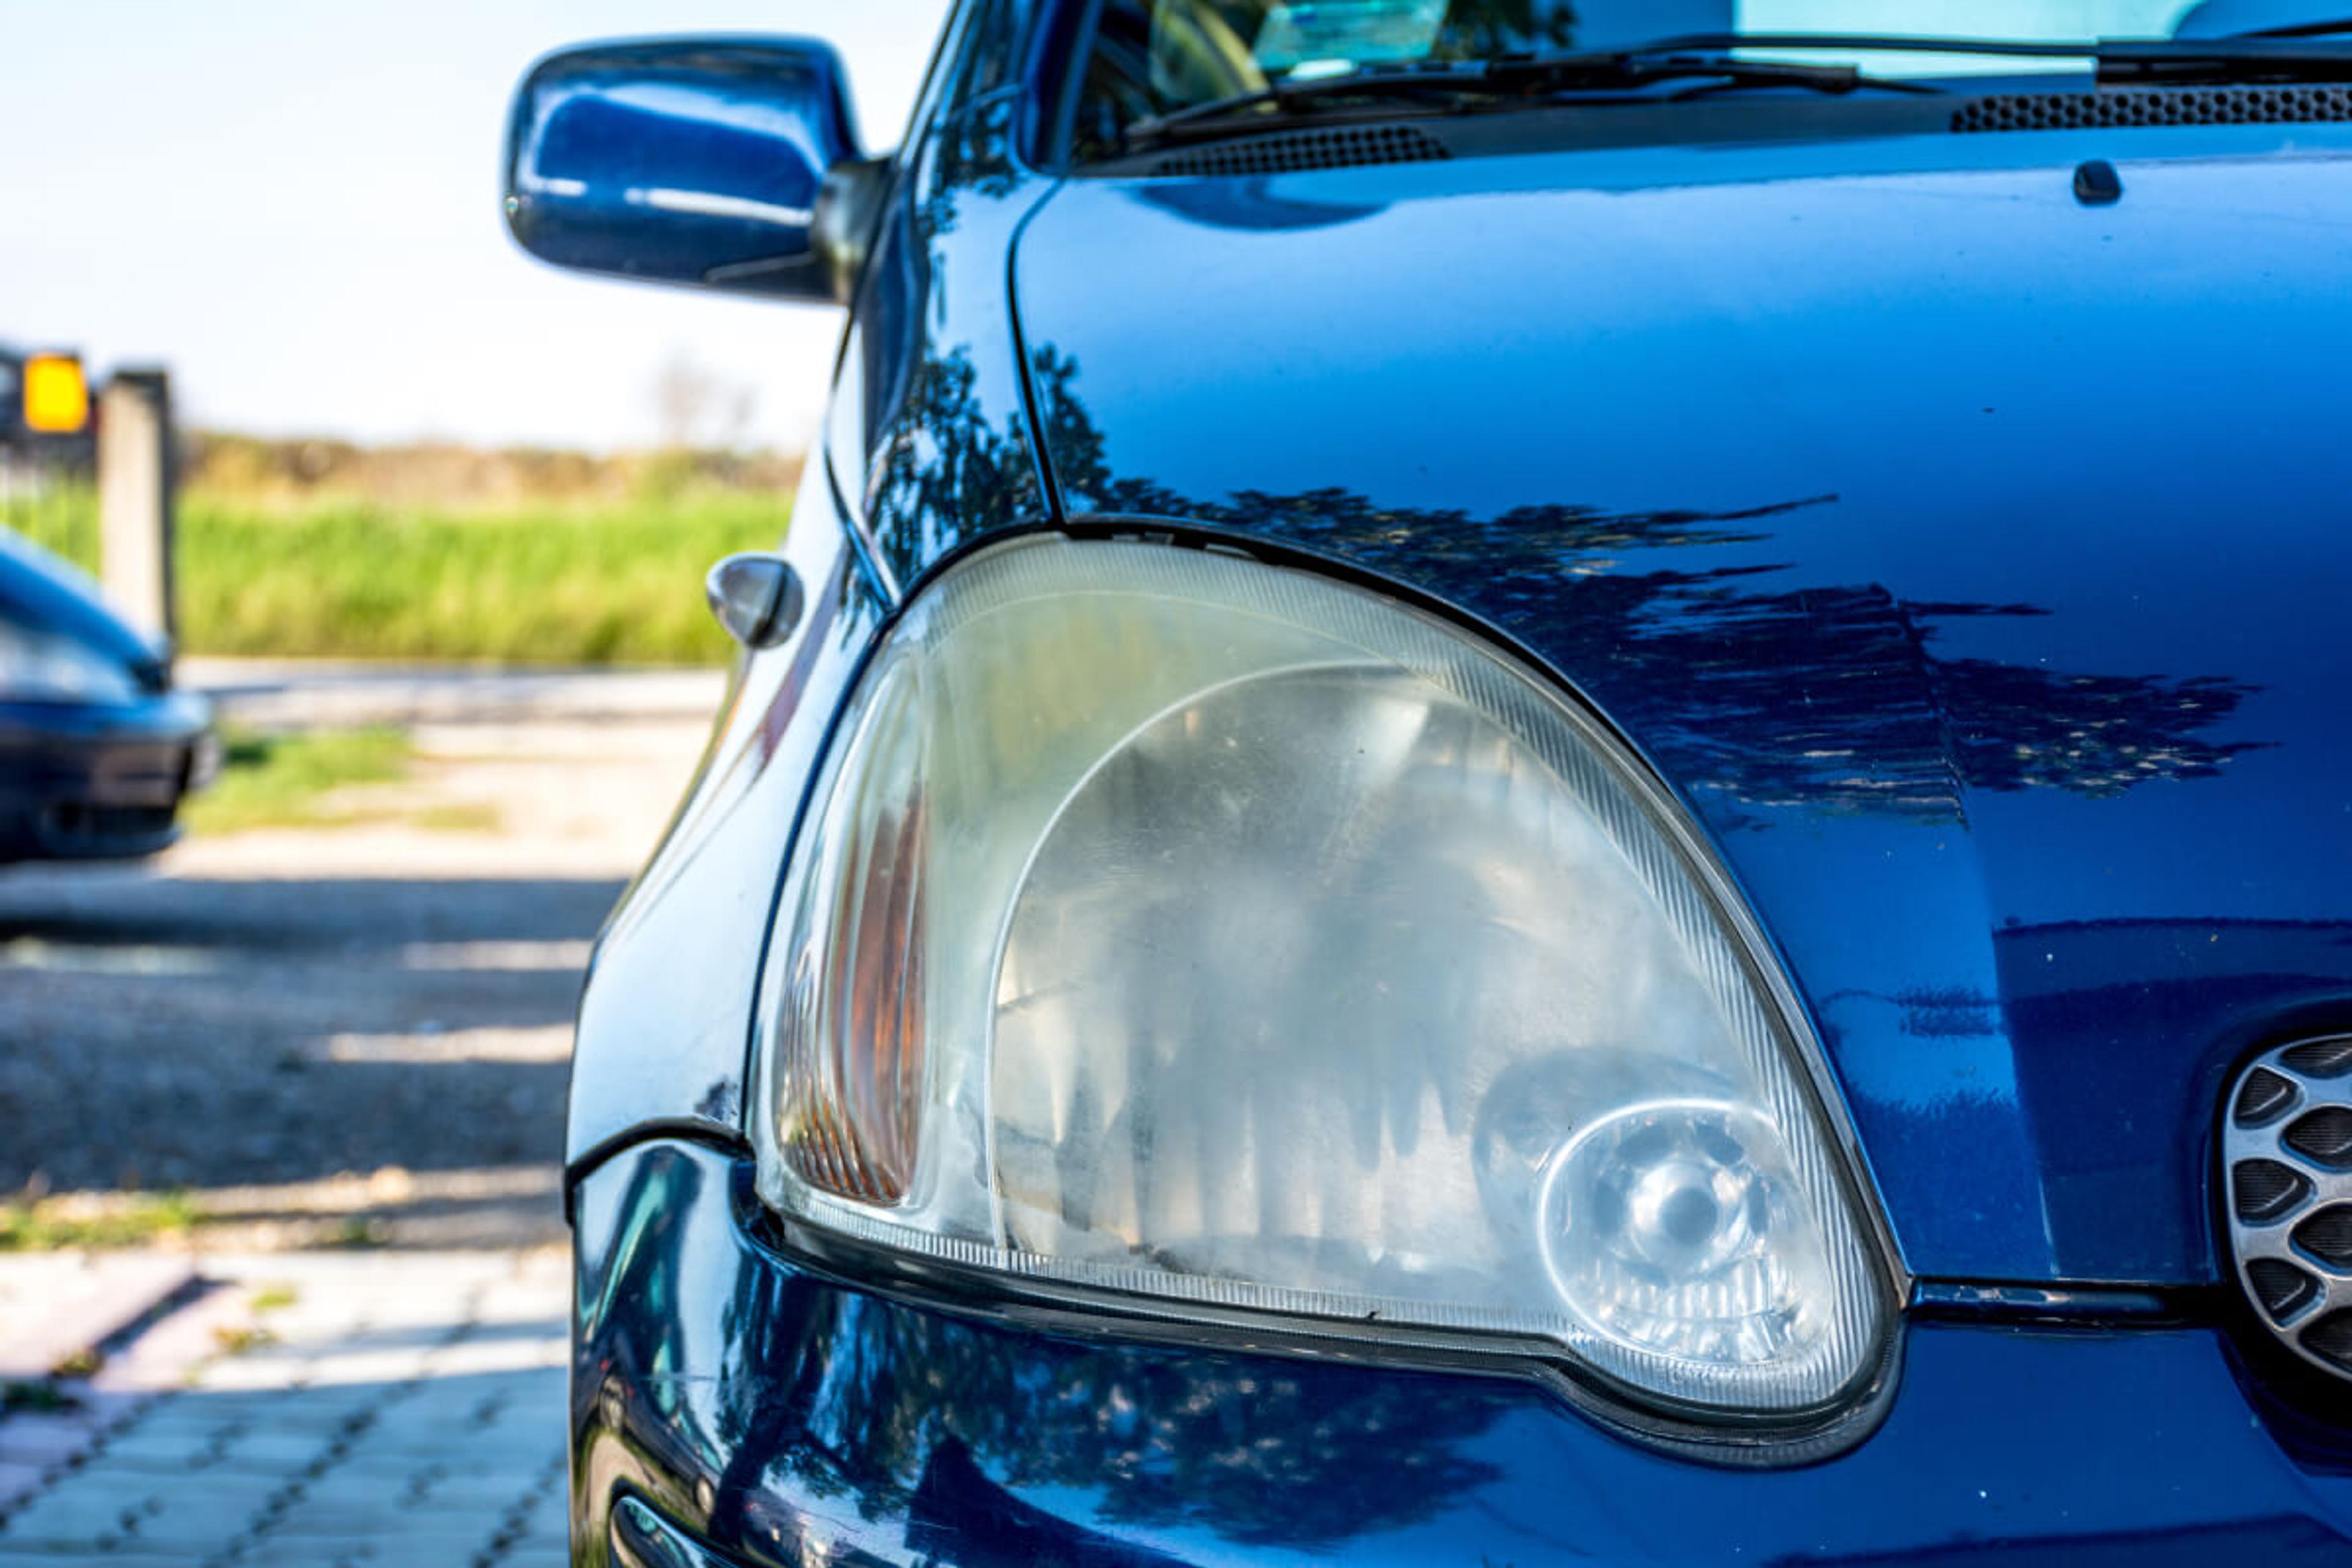
Do your car headlights look like they belong in a haunted house rather than on the road? Over time, headlights tend to accumulate dirt, grime, and moisture, which leads to reduced brightness. Naturally, this can affect how well you see the road.
Luckily, cleaning foggy headlights at home is not that complicated if you have the right tools and some knowledge.
Let’s shed some light on how to banish that foggy, murky appearance and bring your headlights back to life using commercial products and easy DIY hacks.

Looks can be deceiving!
Don't risk your safety - check it with carVertical first
Why your headlights turn yellow or foggy
The materials used in making headlights play a significant role in their tendency to turn yellow or foggy over time. Most modern car headlight lenses are made from polycarbonate plastic, which is praised for its durability and impact resistance. However, it’s also more prone to degradation from various environmental factors.

- Oxidation is one of the primary causes of yellowing or fogging headlights. It occurs when the surface of the plastic reacts to oxygen, leading to the breakdown of the material.
- Ultraviolet (UV) rays. Similarly, UV rays can accelerate the degradation process by breaking down the molecular structure of the plastic’s surface. Moreover, certain additives or coatings applied to the headlights during manufacturing may contribute to discoloration when exposed to UV rays.
- Environmental factors. Such elements as road debris, pollution, chemicals, and similar can damage the headlights’ surface, making it more susceptible to fogging.
- Extreme temperatures. Exposure to heat or fluctuations in temperature can cause the plastic to expand and contract, leading to micro-cracks and weakening the protective layer.
- Moisture and condensation inside headlights can also contribute to a cloudy appearance. When there’s a crack in the lens or a breach in the headlight seal, moisture can enter the housing and cause condensation from inside.
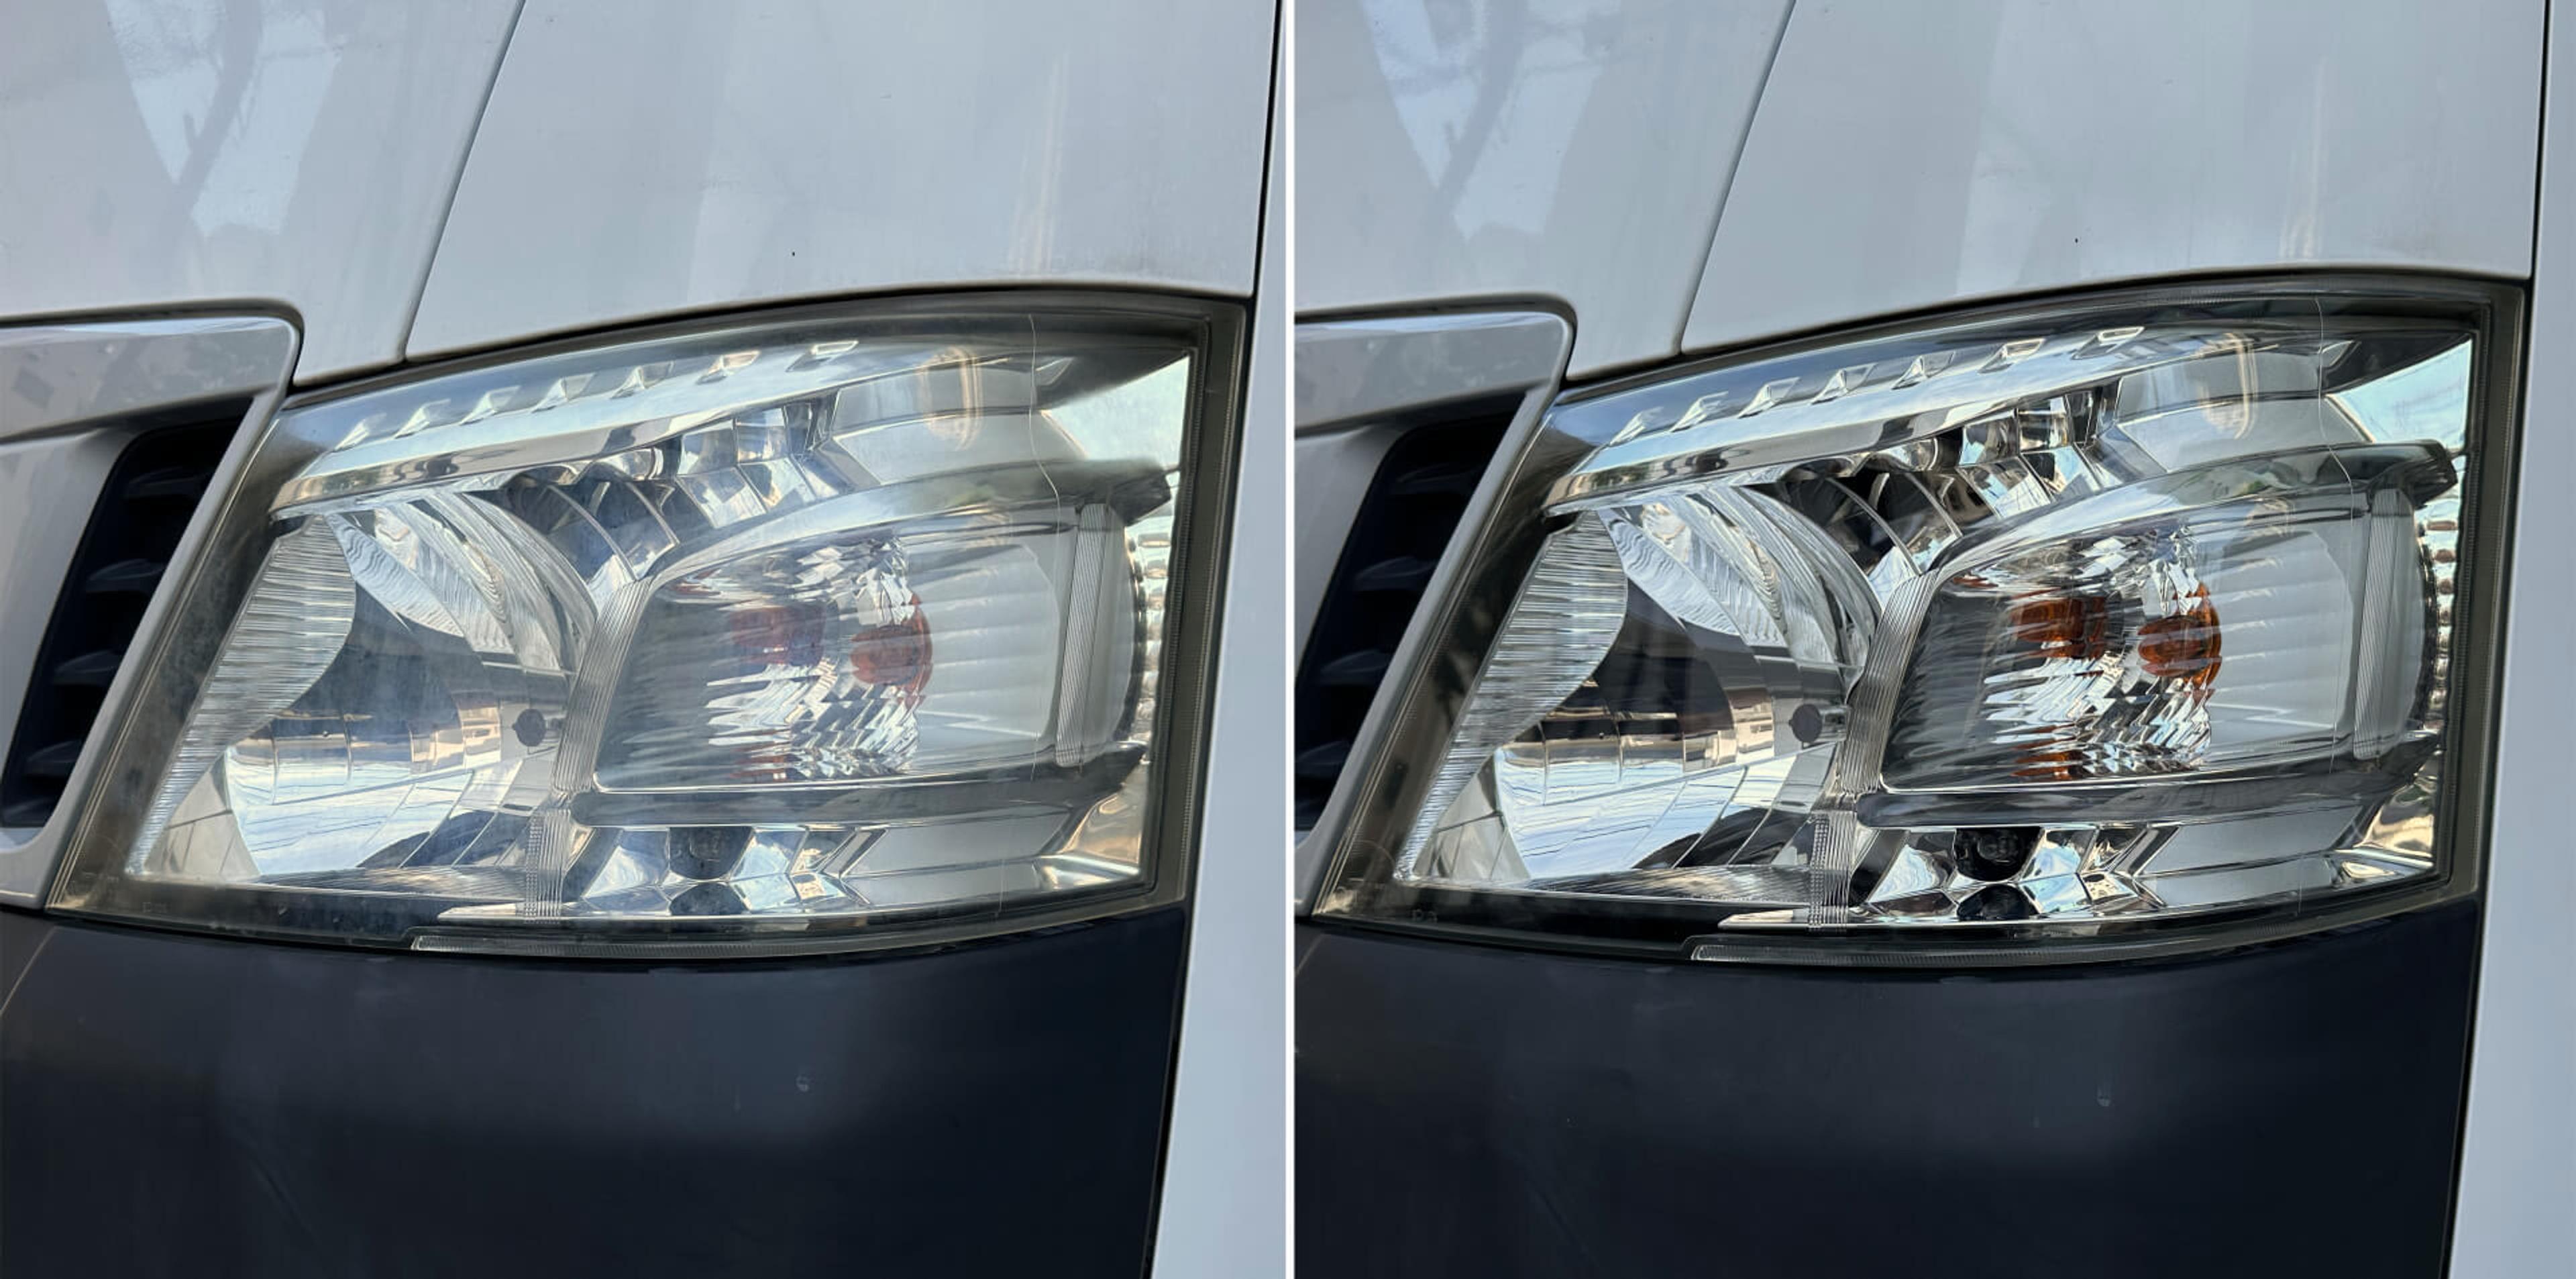
To reduce the impact of these factors, get used to regular maintenance and learn how to clean foggy headlights at home. Depending on the extent of the damage, cleaning foggy headlights can be relatively easy and effective using both professional products and products most people have in their cupboards.
Using commercial products to clean headlights
Products designed for automotive applications can often be more effective than homemade remedies, especially if your headlights are heavily damaged or severely fogged.
In such cases, you can try two of the most common professional-level cleaning methods: use a polishing compound or buy an entire headlight restoration kit.
How to restore your headlights with polishing compound
A polishing compound is a specialized product that removes oxidation, haze, scratches, and other surface imperfections. It usually comes in liquid or paste form and contains abrasive particles or chemicals that help restore the clarity of the headlights.

To clean foggy headlights using a polishing compound, you’ll also need masking tape, microfiber towels or cloths, soap, and water. Once everything’s ready, follow these steps:
1.Clean the headlights thoroughly with soap to remove any surface dirt or debris.
2.Mask around the headlight using masking tape. It helps protect painted surfaces and other areas around the headlight from accidental damage or abrasion during the cleaning process.
3.Rub some polishing compound on the headlights with a damp microfiber cloth. Use circular motions and moderate pressure and cover the entire headlight. Don’t rush – focus on damaged areas, keep the surface lubricated, and spend at least several minutes on one headlight (depending on the damage level).
4.Stop to check the progress once in a while. Wipe away the excess compound with a microfiber cloth to assess the clarity of the lens. Repeat the process until you’re happy with the result.
5.Wipe the compound off with water and a wet sponge.
6.Take a clean, soft microfiber cloth and finish cleaning the headlights.
How to use a headlight restoration kit
Using a headlight restoration kit is particularly convenient because all the necessary tools and products are already included in it. Generally, it can consist of headlight polish cream/lens clarifying compound, masking tape (optional depending on the restoration kit), lubricant spray, buffing disks or precision polishing pads, and lens sealing wipes.
Follow a step-by-step process to restore clarity to foggy or oxidized headlights, which generally looks like this:
1.Clean the headlights with soap and water to prepare for the restoration process.
2.Mask around the headlight using masking tape.
3.Dose the headlight with a provided lubricant spray to prepare for sanding.
4.Slowly start sanding the headlight. Start with the lowest-grit sandpaper or a polishing pad provided in the kit. Gently sand the headlight lens in back-and-forth or circular motions until the surface becomes uniformly dull. Repeat with progressively finer grits.
5.Dry the headlight lens using a clean cloth.
6.Apply headlight polish cream or lens clarifying compound included in the kit to a soft cloth or microfiber towel.
7.Rub the compound onto the headlight lens for several minutes, covering the entire surface of the lens. Continue until they start to regain clarity.
8.Dry the headlight surface using a clean microfiber cloth or a paper towel.
9.Apply the sealant provided in the kit. Take a lens sealing wipe and rub it over the headlights. It will leave your headlights with a protective coating that will help preserve the clarity and integrity of the headlight lens.
Note: Some headlight restoration kits may skip the sanding process, so after masking around the headlight (step 2), jump straight to step 6 if this is the case.
DIY solutions for fixing foggy headlights
If the damage is not that severe, like mild oxidation or light fogginess, homemade remedies can work just fine. The obvious advantages of DIY solutions are their availability and cost-effectiveness – chances are you already have everything you need at home.
How to clean headlights with toothpaste
Don’t expect miracles from the toothpaste, though – it’s a quick but temporary fix. If your headlights are extremely dirty or physically damaged, it won’t do much, especially compared to professional-grade products or professional cleaning.
However, it can provide a potent polish if your headlights suffer from mild oxidation or start yellowing and must be revived quickly. You will only need some toothpaste (non-gel), microfiber cloth, soap, and water.

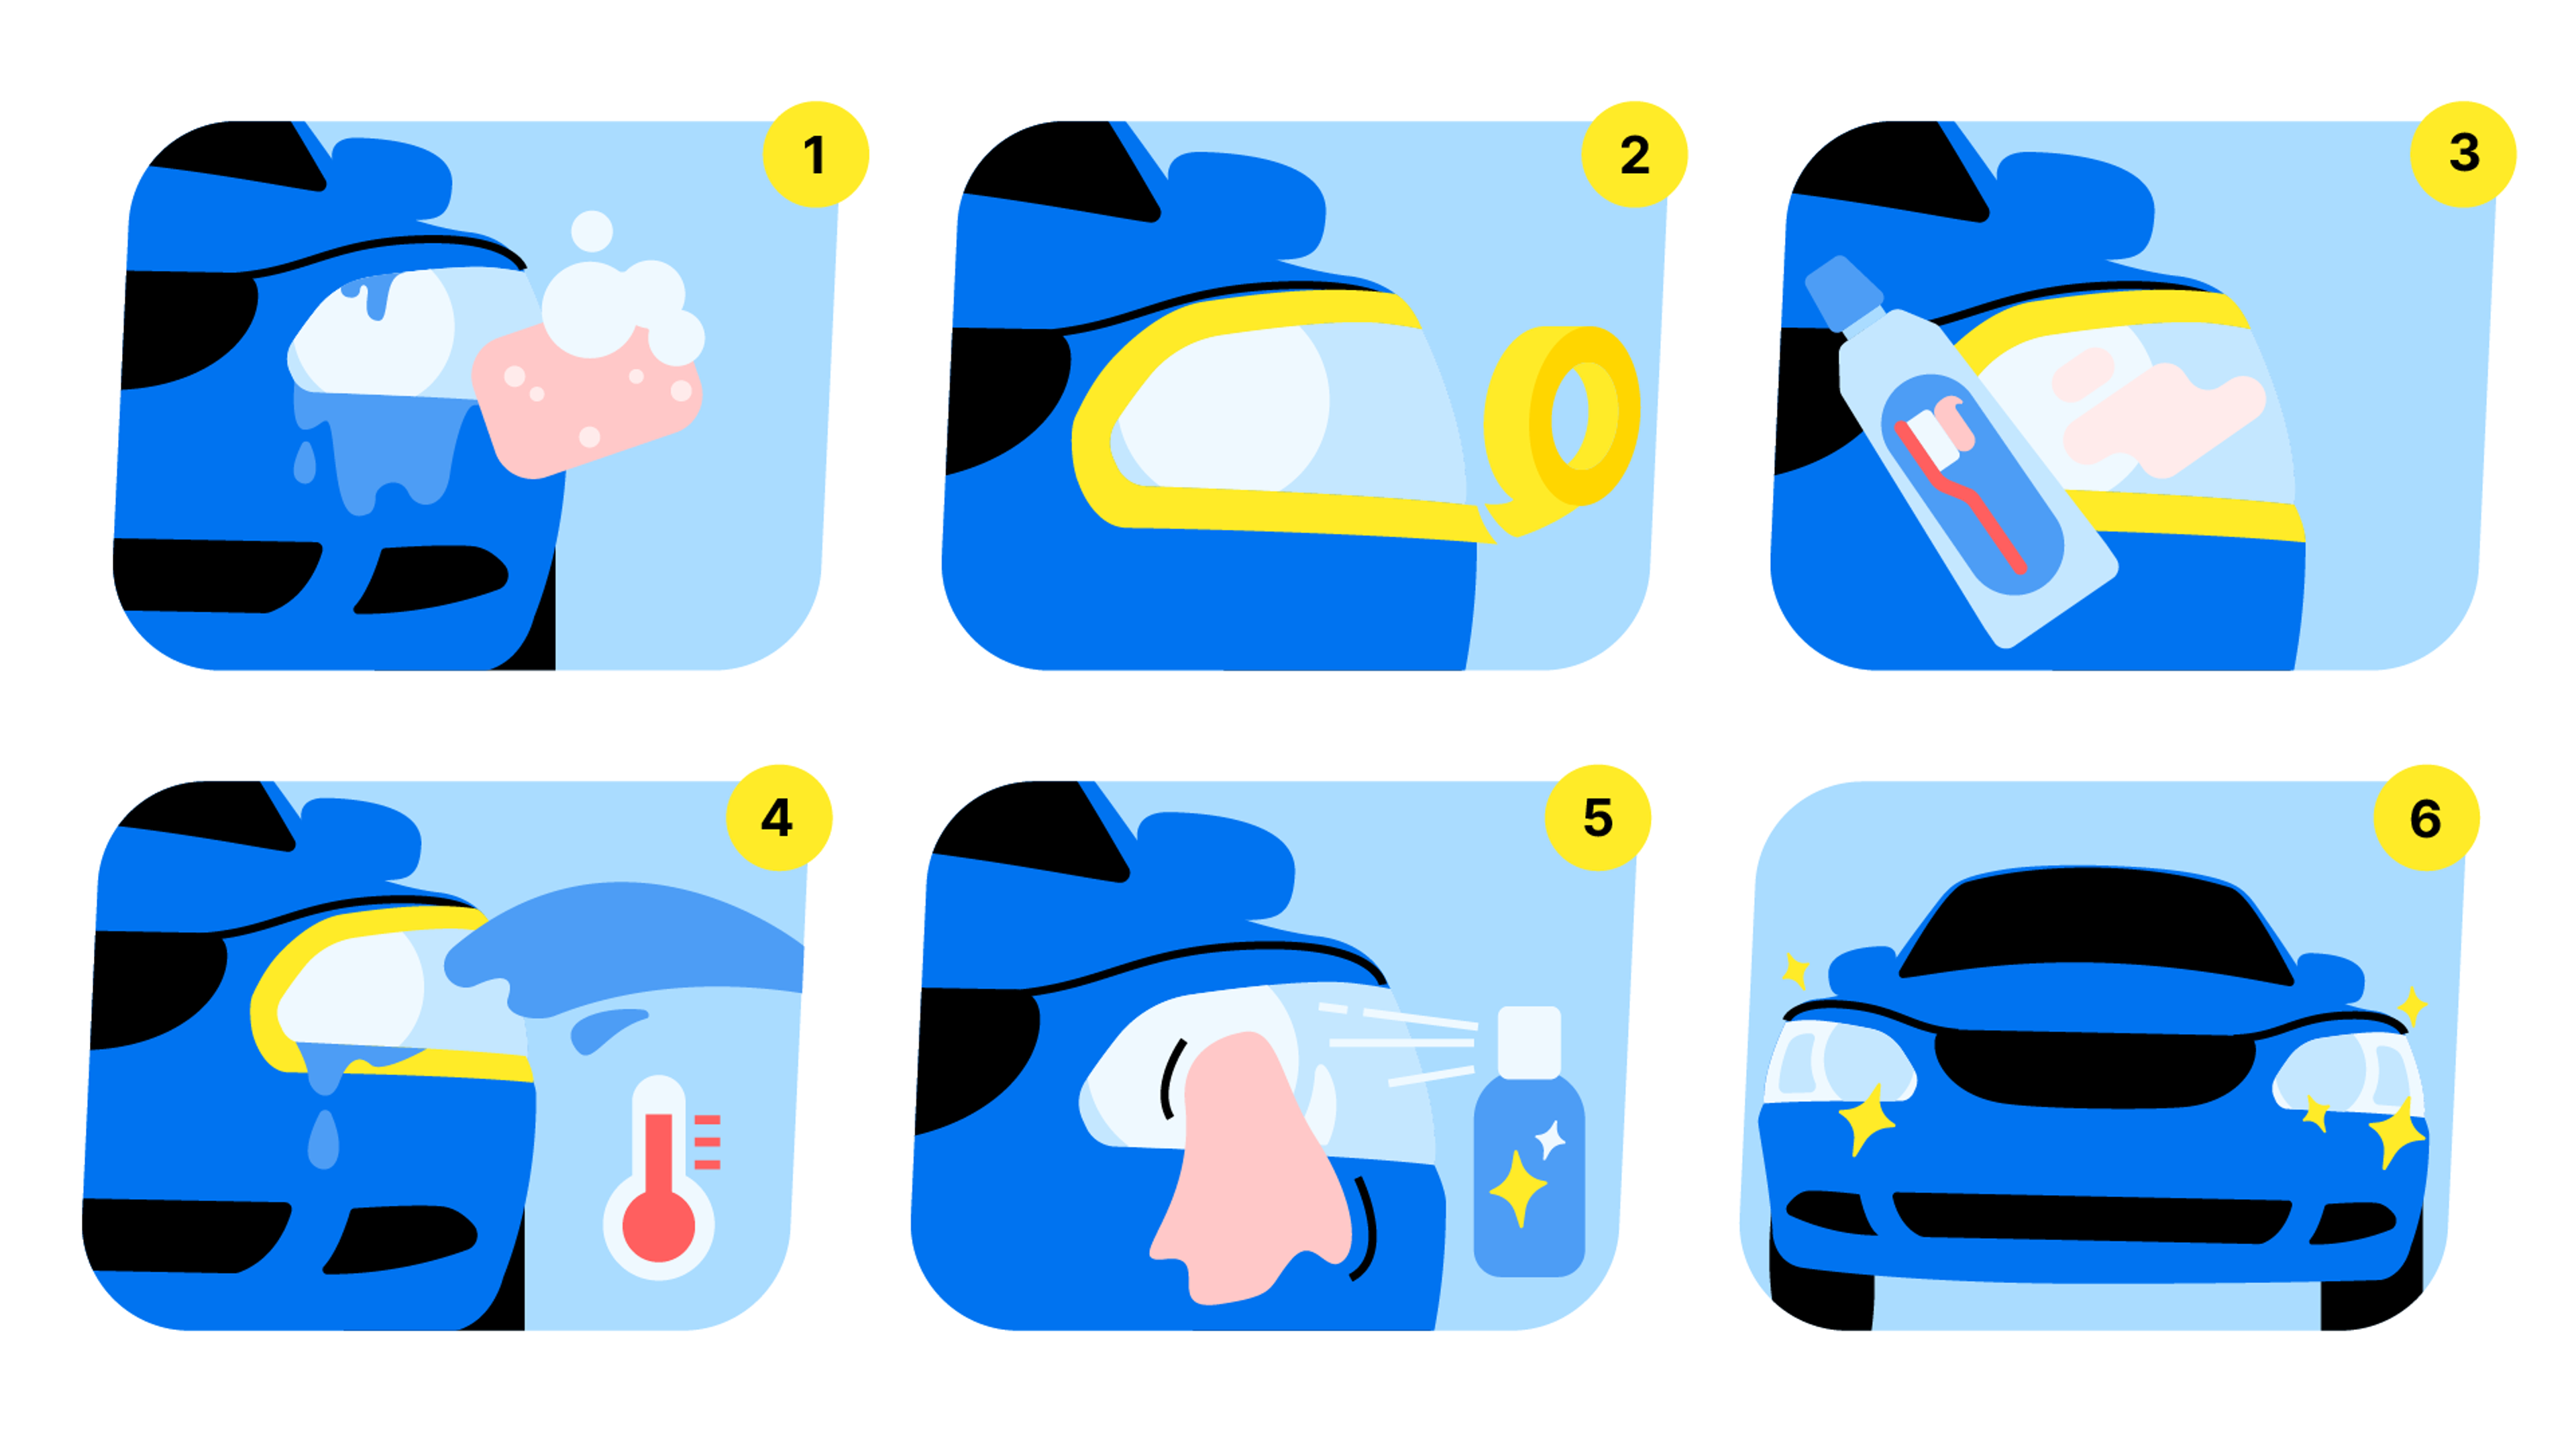
1.Clean the headlights with soap and water to remove any loose dirt. Then, dry the surface with a clean cloth.
2.Mask around the headlight using masking tape to protect your car’s paint from gritty toothpaste.
3.Rub the toothpaste onto the headlight lens. You can scrub it using a cloth, an old toothbrush, or do it with your bare hands. Cover the entire headlight. You don’t need to leave the toothpaste for a long time, just make sure you rub it in and scrub the headlights well.
4.Clean with warm water. Spray some warm water on the headlight and clean it with a cloth or paper towel.
5.Repeat if necessary. The older and the more yellow the headlight is, the longer you may have to brush. You might even have to do a couple more applications of toothpaste, so be patient and repeat the process if necessary.
6.Optional: Apply UV protectant. After cleaning the headlights, consider applying a UV protectant or sealant specifically designed for headlights to protect them from future damage caused by UV rays.
How to clean headlights with baking soda and vinegar
Mixing baking soda and vinegar is another DIY method widely used to clean various stains and surfaces, including car headlights.
To create a cleaning mixture, mix equal parts of baking soda and white vinegar and keep stirring until it forms a thick paste.
1.Clean the headlights with soap and water.
2.Apply the mixture to the headlights. Use a microfiber cloth or sponge to cover the entire headlight surface.
3.Scrub the headlights. Use the cloth or sponge to scrub the headlight lens with the baking soda and vinegar paste. Apply moderate pressure while scrubbing to target areas affected by oxidation or haze.
4.Rinse the headlight lens with water to remove the paste once the scrubbing is complete.
5.Dry the headlight with a clean cloth and inspect the lens for improvement in clarity. Repeat if necessary.
6.Optional: Apply UV protectant to prolong the effect of cleaning and protect the headlights from future oxidation.
Regular maintenance and protection for prolonged headlight clarity
Being vigilant about regular maintenance and learning some extra tricks can help you ensure that your car’s headlights remain clear and free from fogging or yellowing for a longer time. Here are some tips that can help you keep up with it.

Clean and polish regularly
Regular cleaning and polishing are crucial for maintaining the clarity of your car headlights and preserving their condition. Consistency in cleaning not only helps to keep your headlights looking bright but can also prevent the buildup of contaminants that can contribute to cloudiness and discoloration.
It’s recommended to clean your headlights at least every three to six months to keep them looking as shiny as new. Avoid harsh cleaners not designed for headlights, though – they may cause damage to their surface.
Apply car wax for lasting clarity and protection
Car headlight wax is designed to provide an extra layer of protection to your headlights. It creates a barrier that helps prevent oxidation and yellowing caused by exposure to environmental elements, such as sunlight, pollution, and moisture.
Therefore, after thoroughly cleaning your headlights, add a small amount of wax to a clean, dry cloth and apply it evenly to the headlight lens. Then, gently buff the headlights using a clean microfiber cloth to remove excess wax and bring out the shine.
Doing this can add a few months of protection to your headlights.
Use a UV sealant to prevent oxidation
Similarly to wax, UV sealants for headlights can provide an additional layer of defense, which can go beyond what regular waxing might offer. You can use them both in combination, applying the UV sealant second.
Make sure you cover the entire surface of the headlights and allow it to dry as per product instructions. To remove any excess sealant, buff the headlights gently with a clean microfiber cloth.
Address moisture and condensation issues timely
Addressing moisture and condensation issues promptly is crucial to prevent potential damage to the electrical components within the headlight housing and maintain optimal visibility while driving.
If you notice fogging, droplets, or a misty appearance on the inner side of the lens, try to identify how moisture gets there. It could be due to a damaged seal, a cracked lens, or a crack in the housing. After identifying the source, focus on fixing it as soon as possible. Ask for professional help if you can’t repair it yourself or need replacement.
Monitor your headlights’ condition
Regular monitoring and maintenance of your headlights can help ensure they remain in optimal condition, providing adequate visibility and safety while driving. Give them a proper look once in a while, test whether they’re working correctly, and don’t skip the cleaning part.
Physical damages that haven’t been properly repaired (e.g., after road accidents) can also have various effects on fogging and subsequent issues, and you may not even know about it. Cracks, breaks, seal damage, and even misalignment may all lead to fogging or condensation, compromising your safety on the road.
If you’re buying a used car and are unsure about its potential weak spots, including damaged headlights and how they were fixed, get a vehicle history report. It will shed some light on the car’s past and allow you to discuss potential issues with the seller.

Check your VIN
Avoid costly problems by checking a vehicle's history. Get a report instantly!
